Hands-on experience is crucial in cybersecurity. Whether you’re a penetration tester, red teamer, or enthusiast, a flexible and automated lab environment can make all the difference. With Ludus Cloud, developed by Bad Sector Labs, combined with a existing Proxmox server and GOAD (Game of Active Directory) , you can quickly deploy scalable and realistic hacking labs.
Quick note;
Although all Ludus documentation is available on the official website, I encountered some challenges installing it on an existing Proxmox server. These mainly involved adapting Ludus to a pre-configured environment, requiring additional troubleshooting.
What is Ludus?
Ludus is an open-source platform that simplifies creating and managing cloud-based environments for cybersecurity training and research. It streamlines deploying reusable labs, making it ideal for simulating realistic attack and defense scenarios.
Why Use Ludus?
Ludus Cloud excels in several key areas:
- Automation: Skip the tedious setup. Ludus automates virtual machine provisioning, network configurations, and service deployment, so you can focus on learning and experimenting.
- Templates: Leverage pre-configured templates for fast deployment. Create cloneable labs or “break-it” scenarios for testing and troubleshooting.
- Speed: Launch fully functional labs in minutes. Spend more time exploring vulnerabilities and testing exploits, not setting up environments.
Requirements for Ludus
- Proxmox 8 (e.g. “bare metal”, see Deployment Options)
- at least 32GB RAM per user/range that will be deployed
- at least 200GB storage for initial templates and at least 50GB per user/range that will be deployed (large, fast NVMe drives recommended)
- no more than 150 users per Ludus host
- Internet connected (not via WiFi)
- Root shell access
- If you want to access Ludus across the internet;
- 1 public IP address
- the ability to allow in arbitrary ports (i.e. port forwarding or control of the cloud firewall)
Well enough chit-chat, lets dive in!
Installing ludus
First we start with installing ludus on my existing second node (pve02), it is as simple as piping the install script form ludus.cloud to bash and execute.
curl -s https://ludus.cloud/install | bash
Next up, configuring the network interfaces/settings which likely will be the default settings. 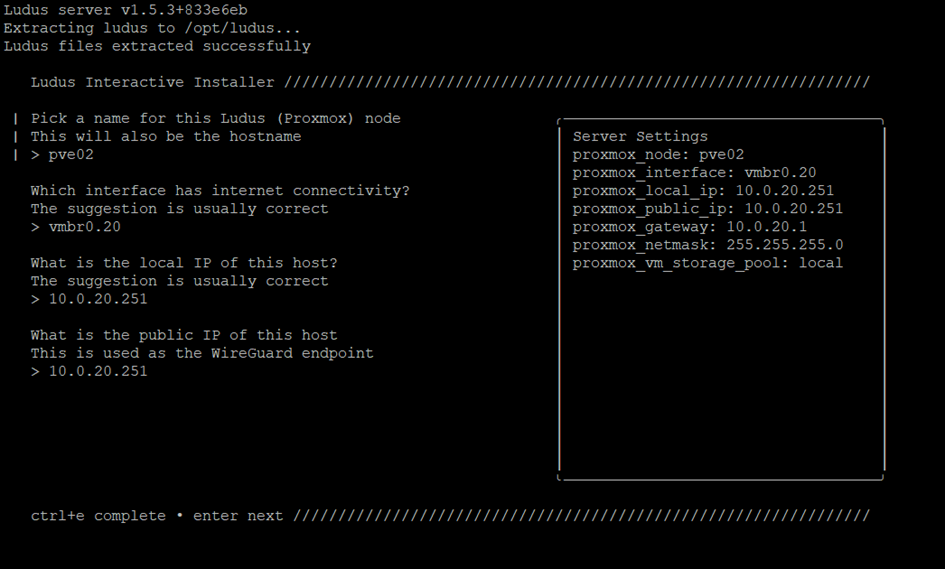 In my case in used my NFS storage node and used the production datastore which in later notice changed to a development datastore because i want to run my ludus cloud environment totally separate from my production environment.
 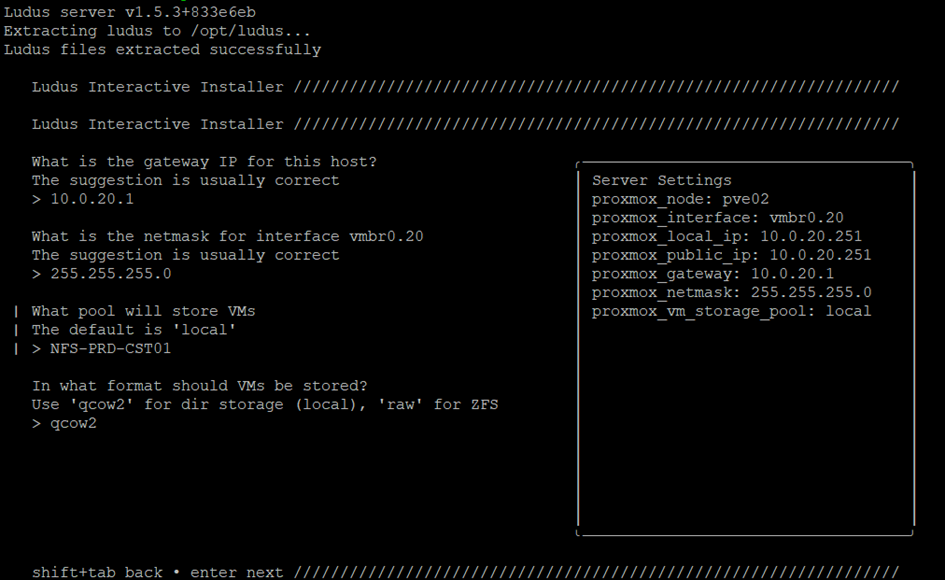 I also want to store my ISO files on my development NFS datastore because that is the place i have allot of storage available. This setting is something (i think) only can be adjusted later on.
 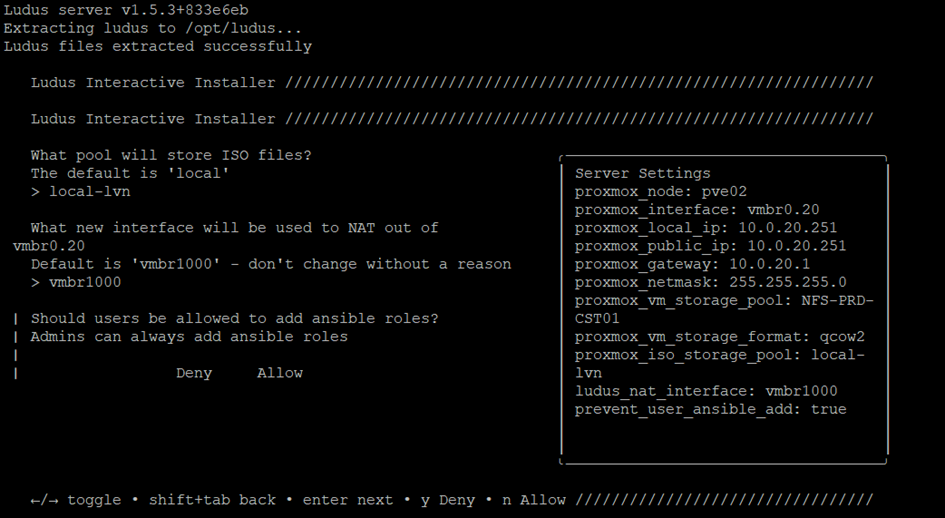 As mentioned above i changed the settings to my development datastore by change the config in the
 /opt/ludus/config.yml file 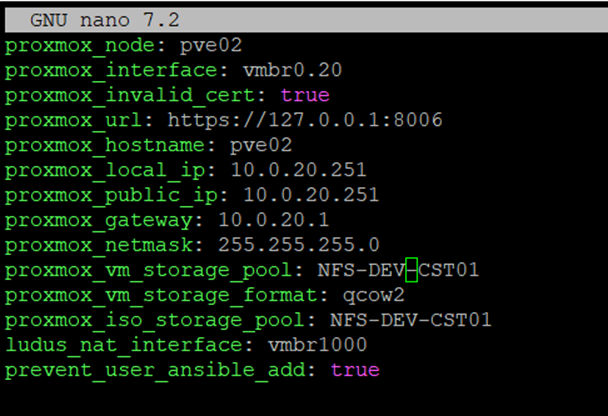
Next up i needed to manually change the ACL permission on this NFS datastore for the automatically created ludus_users and ludus_admin group.
pveum acl modify /storage/NFS-DEV-CST01/ -group ludus_users -role DataStoreUser


pveum acl modify /storage/NFS-DEV-CST01/ -group ludus_admins -role PVEDatastoreAdmin
To check if ludus is installed correctly and retrieve the Root API key simply run; ludus-install-status 
Success! Alright next up we need to create our own admin management user to handle our templates and ranges. Set the RootAPI as a system variable and add your own admin user.
LUDUS_API_KEY='ROOT-API' \ ludus user add --name "YOURNAME" --userid ID/SHORT --admin --url LOCALHOST API URL/PORT
 From the output and checking in the pve admin interface we can see the new admin user is successfully created. Make good note of the API from both the ROOT and management user!
  Switching to the management user
 su arjen enables us to proceed with the installation, don’t forget to add the new management user API as a system variable!
Next thing, we need templates, templates are just basic deployments of different operation systems. which later on will be configured using ansible&packer.
To check the current installed templates run ; ludus templates list. You should see something like this: the default template’s from Ludus are available, but not yet built. 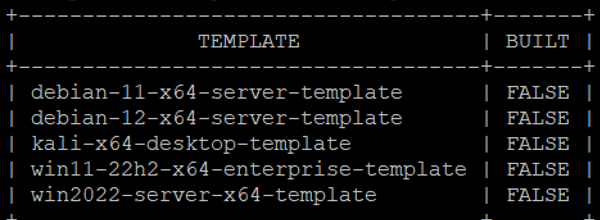
Installing templates
Let’s install some templates by cloning the ludus github repo to /tmp.
cd /tmp
git clone https://gitlab.com/badsectorlabs/ludus
cd ludus/templates
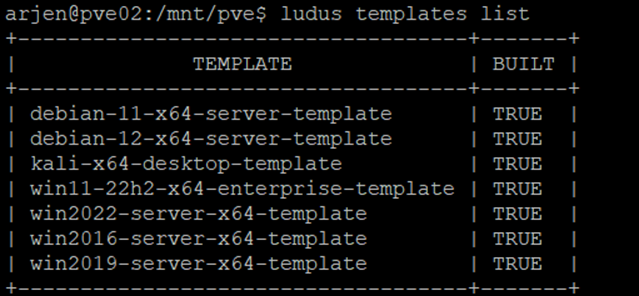
You should see a variety of templates, including the necessary Windows ones we need.  To add the required templates, run :
 ludus templates add -d windows2016-server-x64 and ludus templates add -d win2019-server-x64 this will pull the Windows server 2016/2019 templates. Next-up lets build all the templates using ludus templates build . After a while you should see something like;
Installing GOAD
Ok! Our ludus installation is ready to deploy GOAD.
note
Bad Sector Labs just made installing GOAD way easier with a simple bash script. Before this, you had to manually set up the ranges (environments). It’s still worth learning about ranges if you ever want to build your own automated hacking lab or use other pre-built labs!
cd /tmp/ludus #go to our ludus dir
git clone https://github.com/Orange-Cyberdefense/GOAD.git  #clone the GOAD repo from github
cd GOAD
sudo apt install python3.11-venv  #install python virtual environment-package, you may need to switch back to the root user for this!
./goad.sh -p ludus  #execute the goad shell script
GOAD/ludus/local > check
GOAD/ludus/local > set_lab GOAD # choose your version ; GOAD/GOAD-Light/NHA/SCCM
GOAD/ludus/local > install
I ran into some disk space errors, but the deployment went fine and installed on my development NFS share. 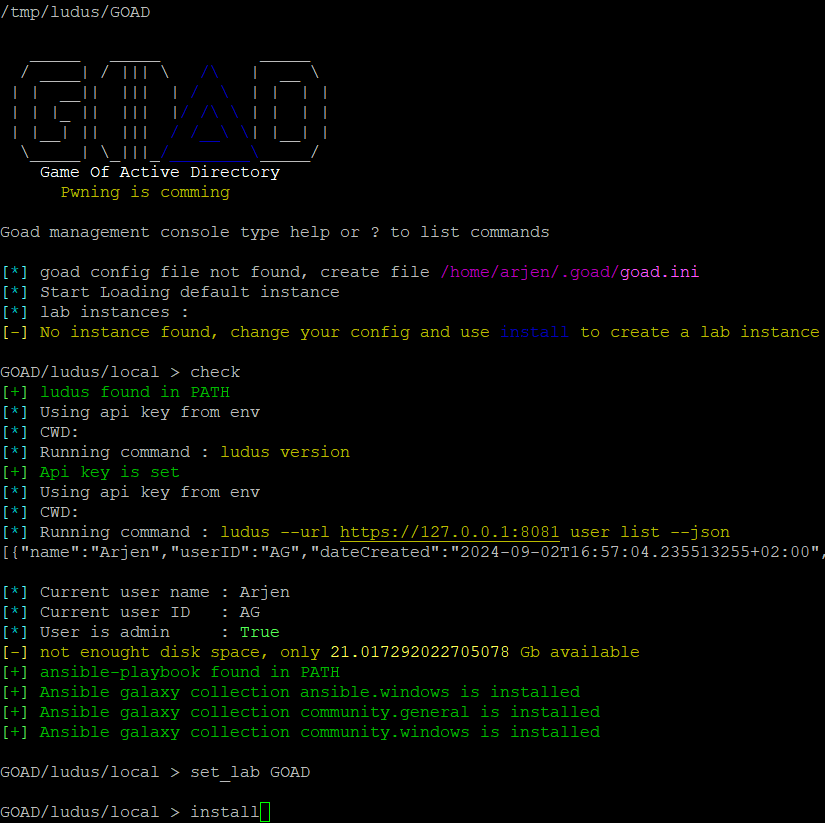
After a long wait (multiple hours) you get the output: 
tip
I recommend taking snapshots of all the default machines you just created. That way, if something breaks, you can easily roll back to the default state.
Installing WireGuard VPN
Last thing we need to settle is the WireGuard VPN. On your Proxmox host, execute the command ludus user wireguard | tee ludus.conf Next, Copy the configuration file to your attacking machine (Kali, Windows/WSL) and import it into your WireGuard client. Once the WireGuard tunnel is successfully established, you should be able to ping one of the GOAD hosts. 
Happy Hacking!
Now that the GOAD environment is up and running, it’s time to start hacking! Feel free to explore on your own or follow the guide from the creator of GOAD.
Closing note
My final tip is that once you’ve completed this lab, try recreating the environment without Ludus. Installing and configuring an Active Directory environment is a valuable learning experience. By understanding how to set up an Active Directory environment, you’ll not only know how to exploit it, but more importantly, how to securely configure one.